AI Connector
Connect AI tools like Claude Code, Cursor, ChatGPT or Kimi to your shop and let them design pages, manage products, upload photos, write blogs and publish changes — all through a secure, revocable token.
The AI Connector turns Ecomplify into a platform both humans and AI agents can operate: the same sections, settings and publishing flow you use in the Theme Editor are exposed to AI tools as a structured, validated API.
What an AI can do
With a token from Dashboard → AI Connector, a connected AI can:
| Area | Capabilities |
|---|---|
| Design | Read the full section catalog (73 section types + 59 universal design controls), edit any page layout, batch-edit with atomic operations, and publish to the live store |
| Products | List, create, update, delete products; manage collections |
| Photos | Upload images to your Media Library and attach them to products, collections, blogs or page sections |
| Blogs | Write, update and delete blog posts (HTML content) |
| Shop | Update settings, SEO, policies, theme selection and shop-wide design tokens (colors, fonts, buttons) |
Every write is validated against the same rules as the dashboard — an AI can never bypass your business logic, and layout edits are sanitized against the real section catalog.
How it works
- Create a token — Dashboard → AI Connector → Create a token. Choose the access scopes:
- Full access — everything below
- Read-only — audit/report without changing anything
- Products & collections / Design & layouts / Shop info & policies — combinable write scopes
- Pick your tool in Connect your AI tool — the configuration for Claude Code, Cursor, ChatGPT, Kimi, or any REST-capable AI is generated with your token already filled in. Copy, paste into your tool, done.
- The token identifies your shop. No shop ID appears in any URL, so a token can only ever touch its own shop. Tokens are revocable at any time and capped at 5 per shop.
- Drafts and publishing. Layout edits are saved as drafts (visible in the Theme Editor and preview). An AI with the Design scope can also publish — the same snapshot-and-promote flow as the editor's Publish button, including version history and cache purging. You can always roll back from version history.
Connection details
- Base URL:
https://app.ecomplify.com/api - Auth header:
Authorization: Bearer ecai_...(your token) - Start here (machine-readable):
GET /agent/v1— the full API map, scope model, and an AI-orientation guide - OpenAPI 3.1:
GET /agent/v1/openapi.json(for ChatGPT Actions and OpenAPI-native tools) - MCP endpoint (Claude Code / Cursor):
POST /mcp
Claude Code one-liner:
claude mcp add --transport http ecomplify https://app.ecomplify.com/api/mcp --header "Authorization: Bearer ecai_YOUR_TOKEN"
How to instruct your AI
Once connected, just describe what you want in plain language. Good instructions include the brand direction, page structure, and design system you're after — the AI discovers everything else (available sections, design controls, your products) from the API itself.
A well-connected AI will typically:
- Call
capabilitiesto see what it may do - Read the section catalog (
/agent/v1/sections) — section types plus the universal design controls (gradients, overlays, animations, spacing, responsive overrides) - Read or create page layouts and your products/photos
- Apply changes as drafts, show you the preview, then publish when you approve
Two useful phrases to include in your instructions:
- "Work in drafts and show me before publishing" — keeps you in the approval loop
- "Publish when done" — lets the AI take everything live itself
Example: a complete design brief
This is the level of detail that produces excellent results. Paste something like this into your connected AI:
Create a premium, visually stunning modern ecommerce homepage for a fashion
sneaker and footwear brand. The website should feel like a combination of a
high-end fashion brand and a cutting-edge DTC ecommerce store.

### Brand Direction
- Brand name: SOLEA
- Tagline: Move Different.
- Product focus: premium sneakers, lifestyle shoes, running shoes, streetwear footwear
- Target audience: Gen Z and young professionals
- Overall feeling: premium, bold, minimal, energetic, aspirational
- Visual style: editorial fashion photography + modern ecommerce
- Avoid generic Shopify-style layouts and boring card grids

### Homepage Structure

1. Announcement Bar — a slim top bar:
   "FREE SHIPPING ON ORDERS OVER $75  •  EASY 30-DAY RETURNS"

2. Navigation — clean and premium: SOLEA logo, New Arrivals, Sneakers,
   Running, Lifestyle, Men, Women, Sale, search icon, account icon,
   shopping bag icon with item count. Elegant and spacious.

3. Hero Section — the visual centerpiece. Full-width cinematic fashion
   image: stylish model in premium sneakers, dramatic urban architecture.
   Headline: MOVE DIFFERENT.
   Supporting text: "Engineered for movement. Designed for everywhere."
   Buttons: SHOP MEN / SHOP WOMEN.
   Strong typography, excellent contrast, subtle animation, editorial look.

4. Featured Categories — three large visual cards: NEW ARRIVALS,
   EVERYDAY SNEAKERS, PERFORMANCE. Each with a high-quality shoe image,
   minimal text and a sophisticated hover effect.

5. Best Sellers — a horizontal product section titled
   "THE ONES EVERYONE WANTS": 4 premium products with large photography,
   name, short descriptor, price, rating, color options, quick add,
   wishlist. Realistic names: SOLEA Apex, SOLEA Drift, SOLEA Flux,
   SOLEA Urban X.

6. Editorial Banner — full-width. Headline: BUILT FOR THE CITY.
   Text: "From your first coffee to your last train home, footwear that
   keeps up." Button: EXPLORE THE COLLECTION. Artistic street-fashion
   photograph, not a standard product image.

7. Trending Now — a modern product carousel, 4-6 products, large imagery,
   minimal UI. Subtle interactions: image swap on hover, quick add,
   wishlist, color selector, smooth transitions.

8. Brand Story — a visually rich split section. Close-up of premium
   sneaker materials on one side; on the other:
   DESIGNED TO MOVE — "Every Solea shoe starts with a simple idea: make
   something people want to wear every day." Button: OUR STORY.

9. Social / Community — "#MOVEWITHSOLEA": a masonry grid of lifestyle
   images, premium and editorial.

10. Newsletter — minimal dark section: FIRST ACCESS — "New drops, limited
    releases and special offers." Email input + JOIN SOLEA button.

11. Footer — sophisticated multi-column: Shop, Help, About, Customer Care,
    Shipping & Returns, Size Guide, Contact, Privacy, Terms + social and
    payment icons.

### Design System
Large editorial typography, strong hierarchy, generous whitespace,
high-quality photography, subtle rounded corners, smooth hover animations,
micro-interactions, sticky navigation, responsive mobile-first layouts,
premium typography pairing, minimal borders, sophisticated neutral palette
with one bold accent color. The result should feel expensive, modern and
highly polished.

### Important UX Requirements
The page must not feel like a template. Prioritize visual storytelling,
product discovery, fast shopping flow, strong CTAs, clear hierarchy,
accessibility and mobile behavior. Use realistic content — no lorem ipsum,
no placeholder-looking images, no generic AI aesthetics.

Work in drafts, rebrand my existing products to match, upload/attach
imagery where needed, then publish everything when done.
What it looks like in practice
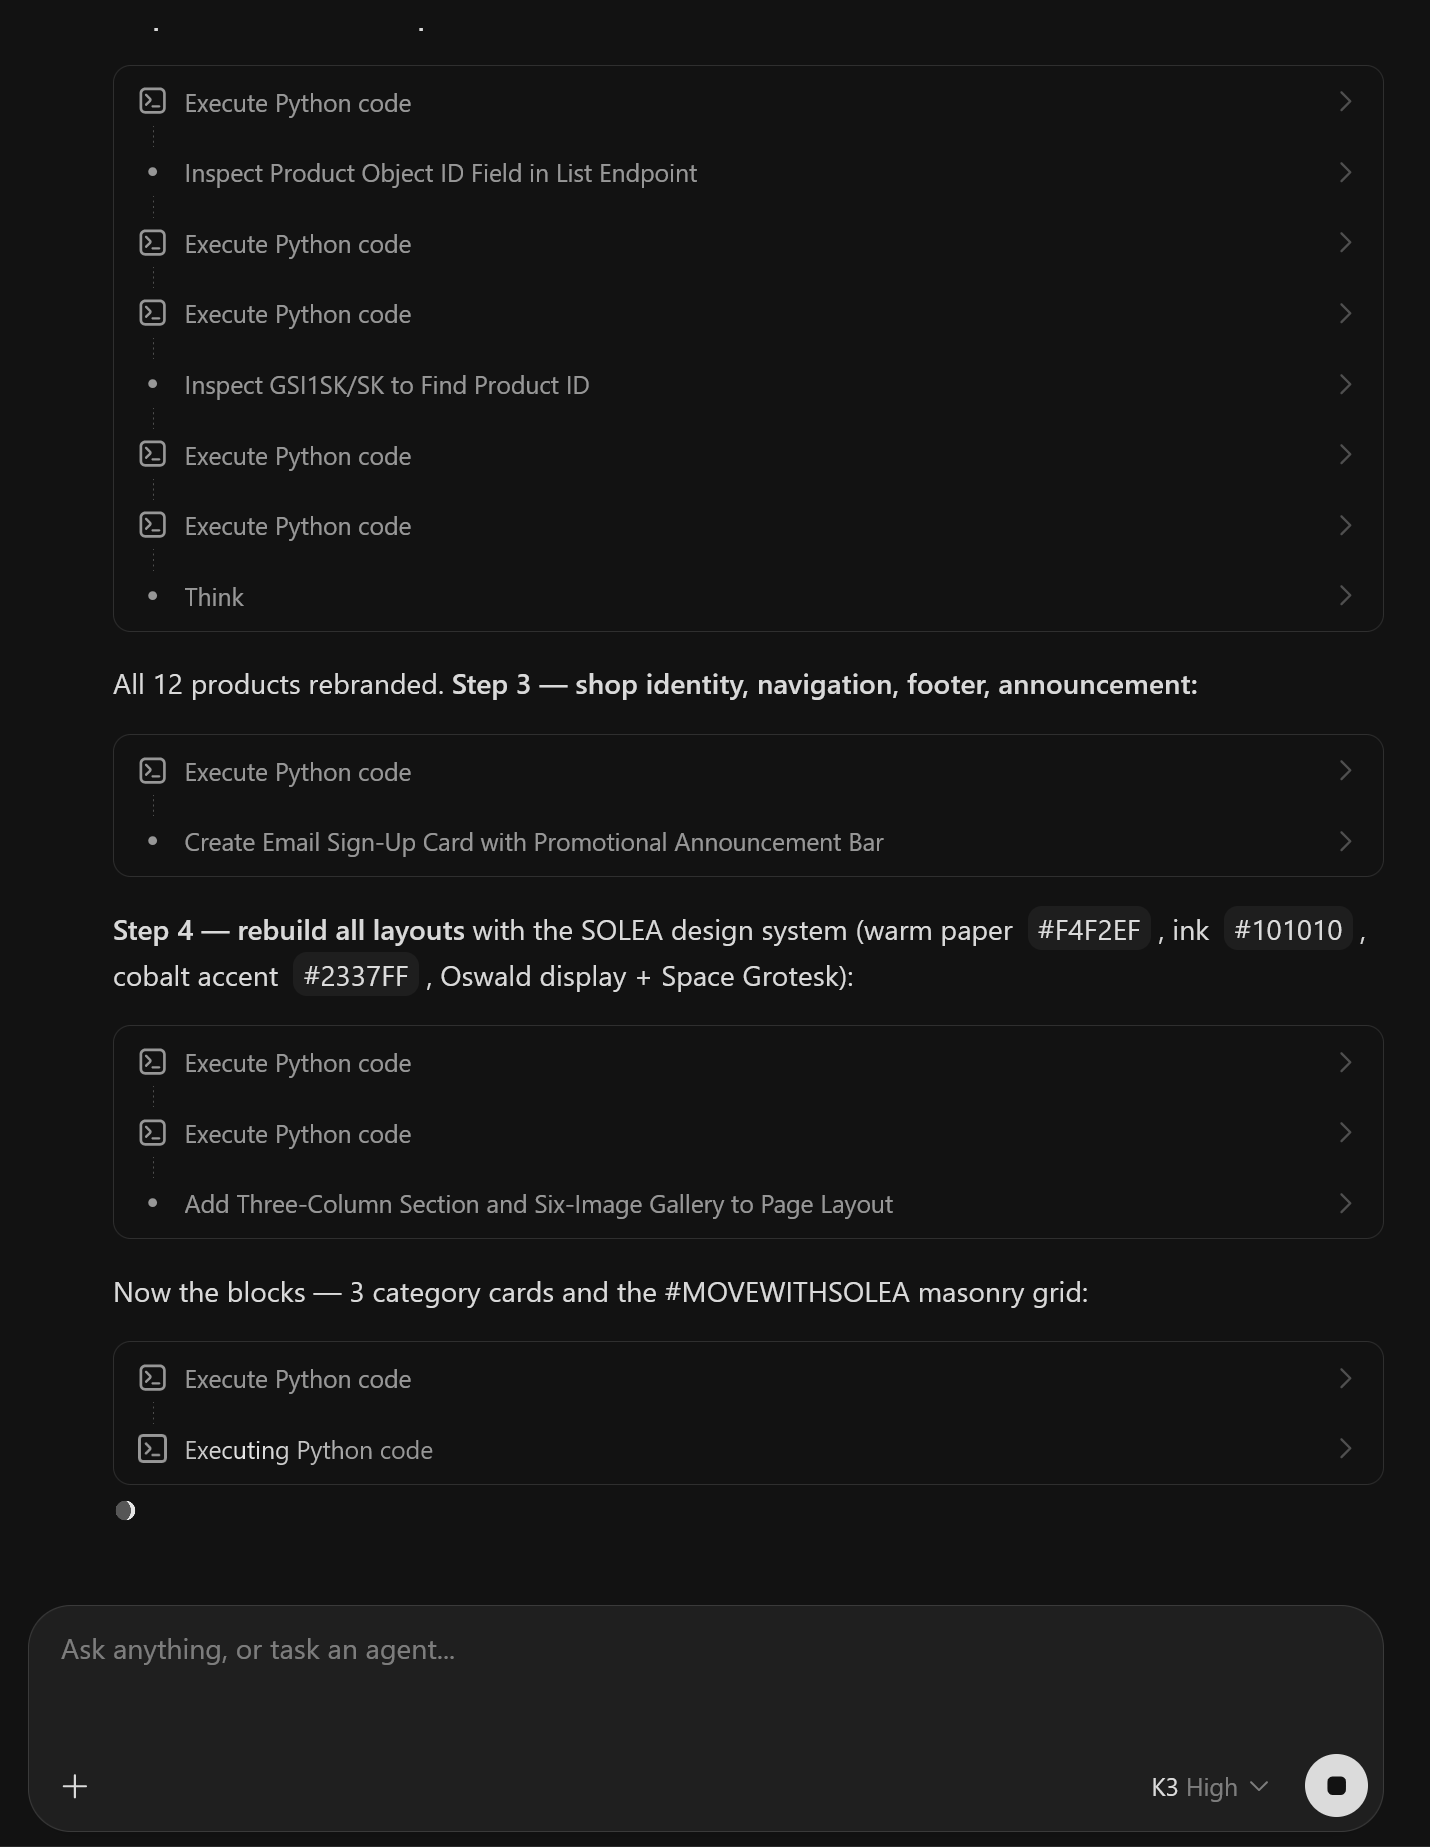
The AI works through the brief step by step — reading your catalog, rebranding products, rebuilding each layout, uploading imagery — narrating as it goes:
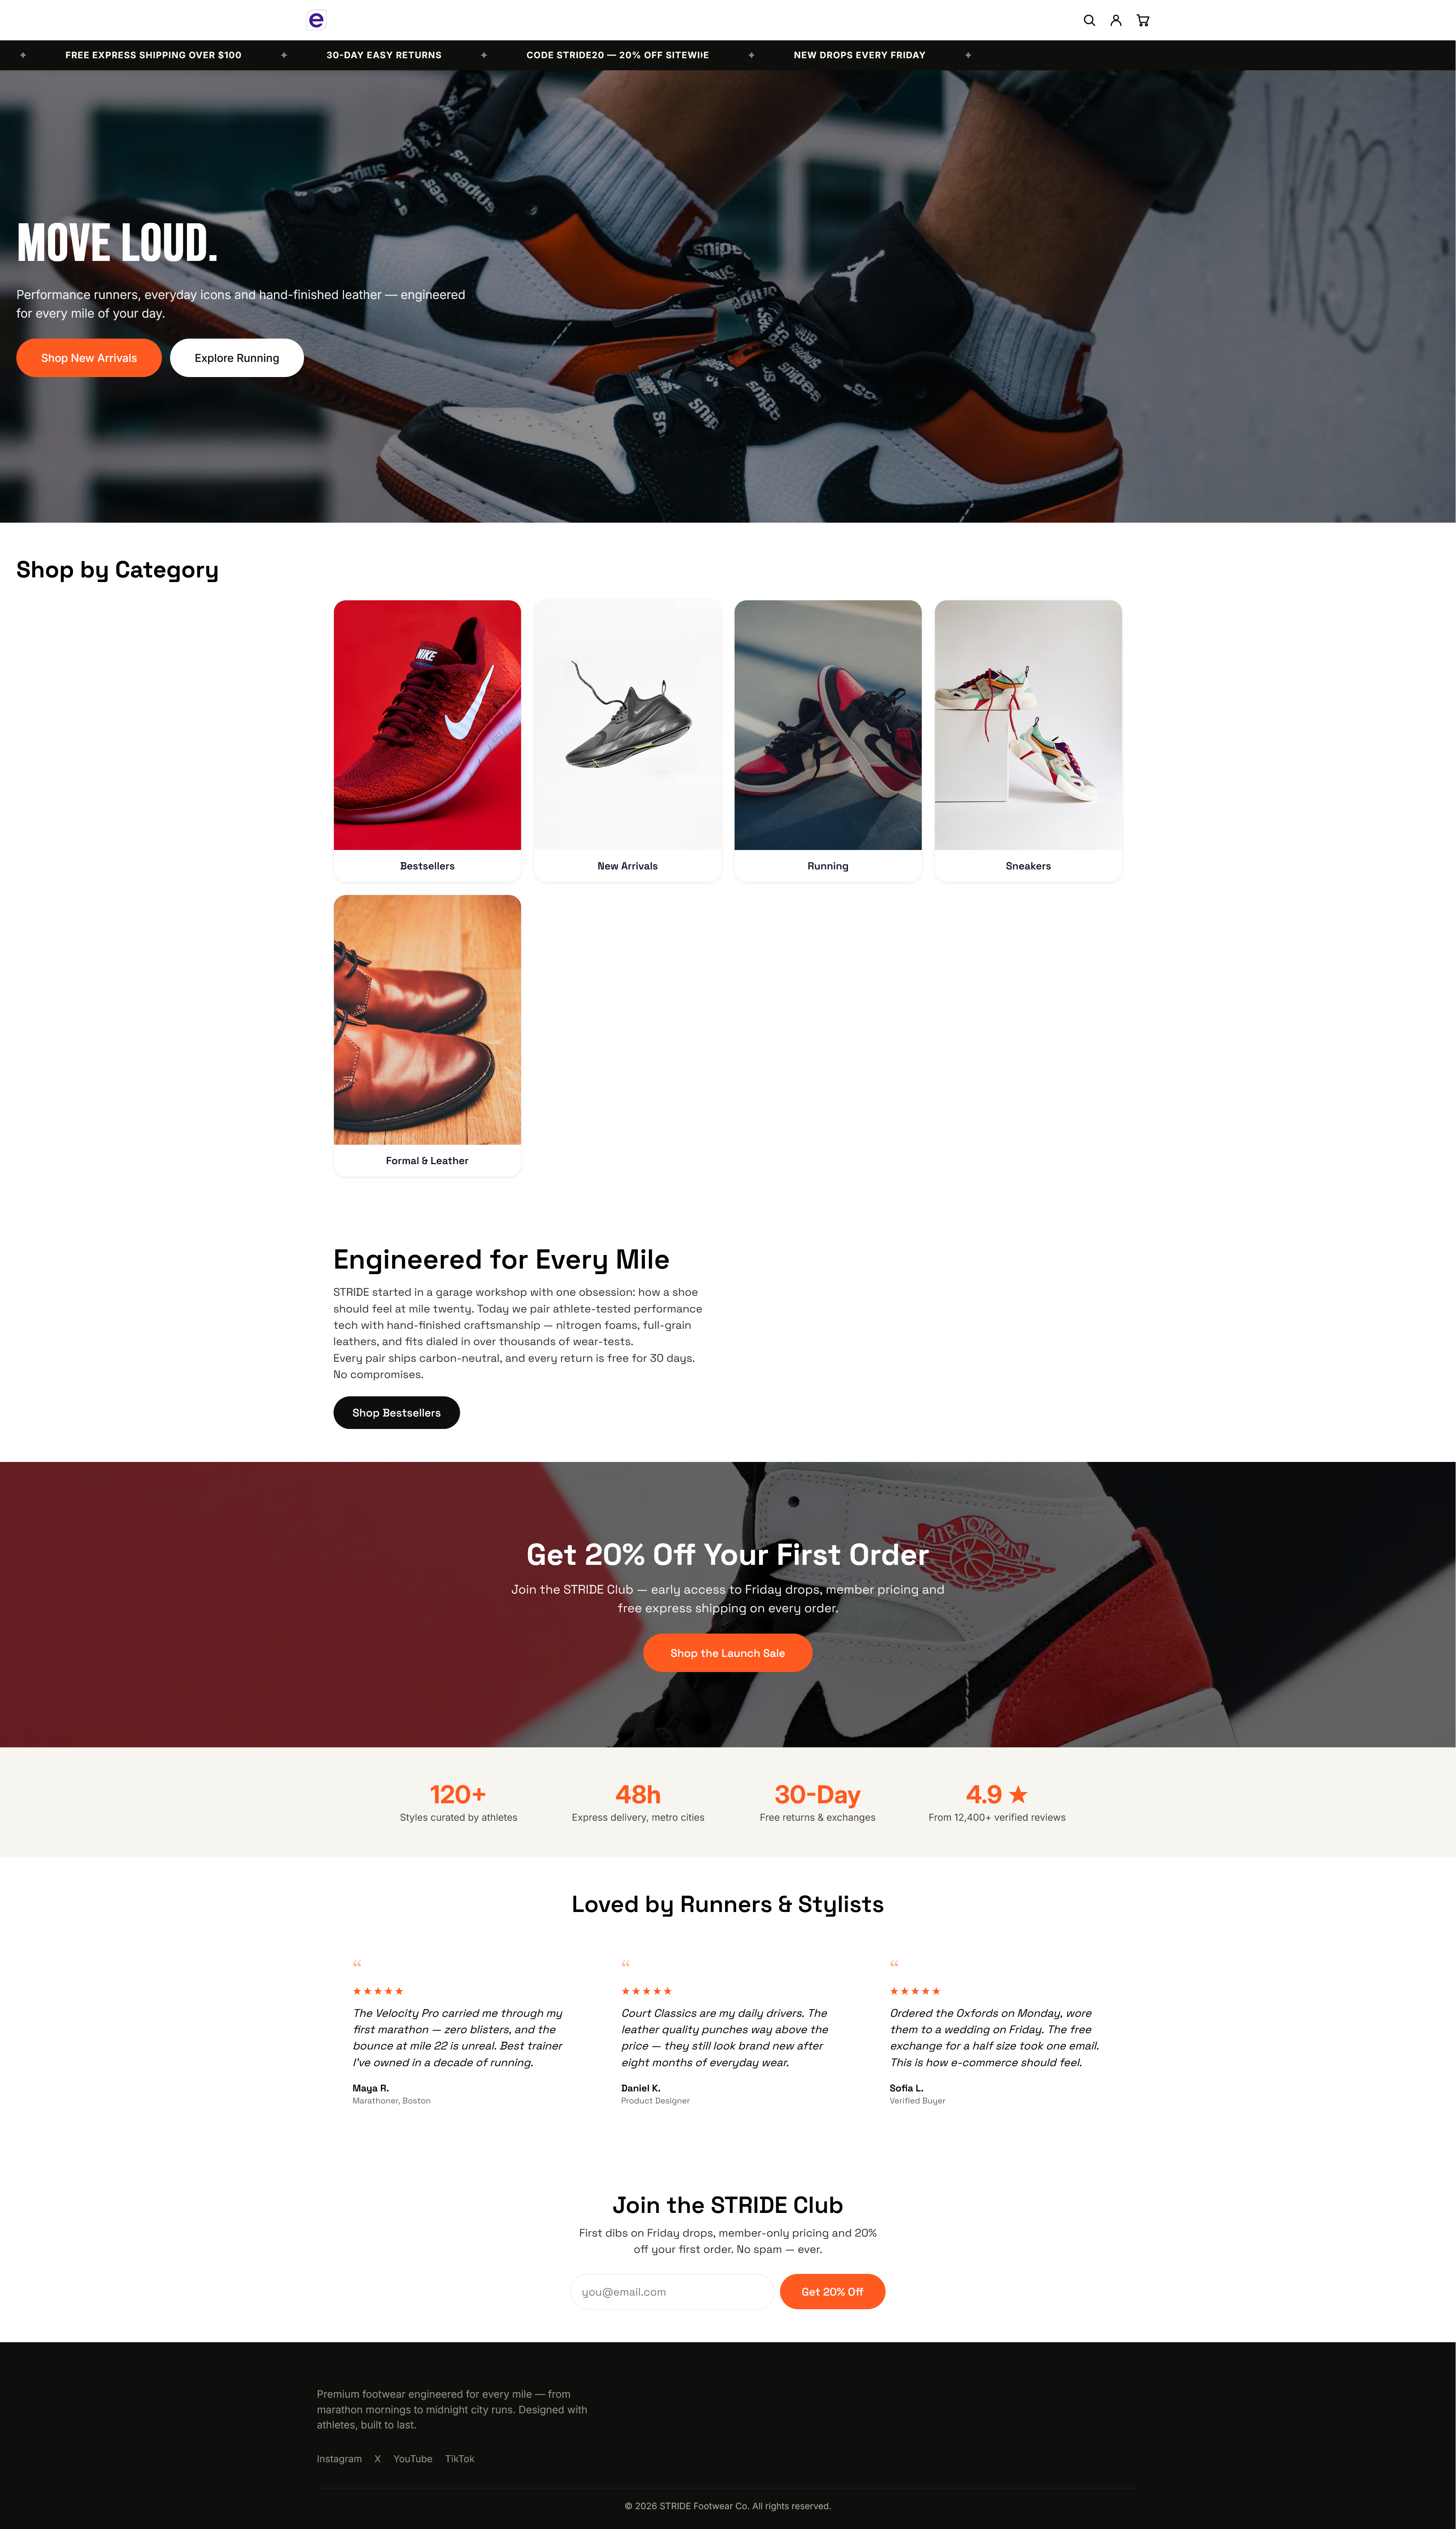
And this is a real storefront produced end-to-end by a connected AI from a brief like the one above — announcement bar, hero, category cards, brand story, promo banner, stats, testimonials, newsletter and footer, published live without touching the editor:
Tips for great results
- Give a real brief. Brand name, mood, audience, section-by-section structure and copy direction — like the example above. Vague prompts produce generic pages.
- Point it at your products. "Use my existing catalog" or "rebrand my products to match" lets the AI bind real products into grids and rails.
- Iterate in drafts. Ask for changes ("make the hero darker", "swap sections 3 and 4") — the AI edits with atomic operations, so nothing else moves.
- Use the preview. Drafts are instantly visible in the Theme Editor preview before anything goes live.
- Scope tokens to the job. Give a content-writing AI the Shop info & policies scope only; keep Full access tokens for trusted end-to-end work.
Security
- Tokens are shown in your dashboard and can be revoked instantly — the AI loses access on its next request.
- Never paste a token anywhere public. If a token may have leaked, revoke it and create a new one (the connect configurations update automatically).
- Every AI write appears in your Activity feed, and layout publishes keep version history for one-click rollback.
- AIs cannot run arbitrary code on your store: all writes go through the same validated, whitelisted fields as the dashboard.