Getting Started
Learn how to set up and start using the Ecomplify Dashboard to manage your online store.
Accessing the Dashboard
- Visit app.ecomplify.com
- Sign up for an account or log in with your credentials
- You'll be taken to your dashboard home page
Dashboard Layout
The dashboard has a clean, intuitive layout with three main areas:
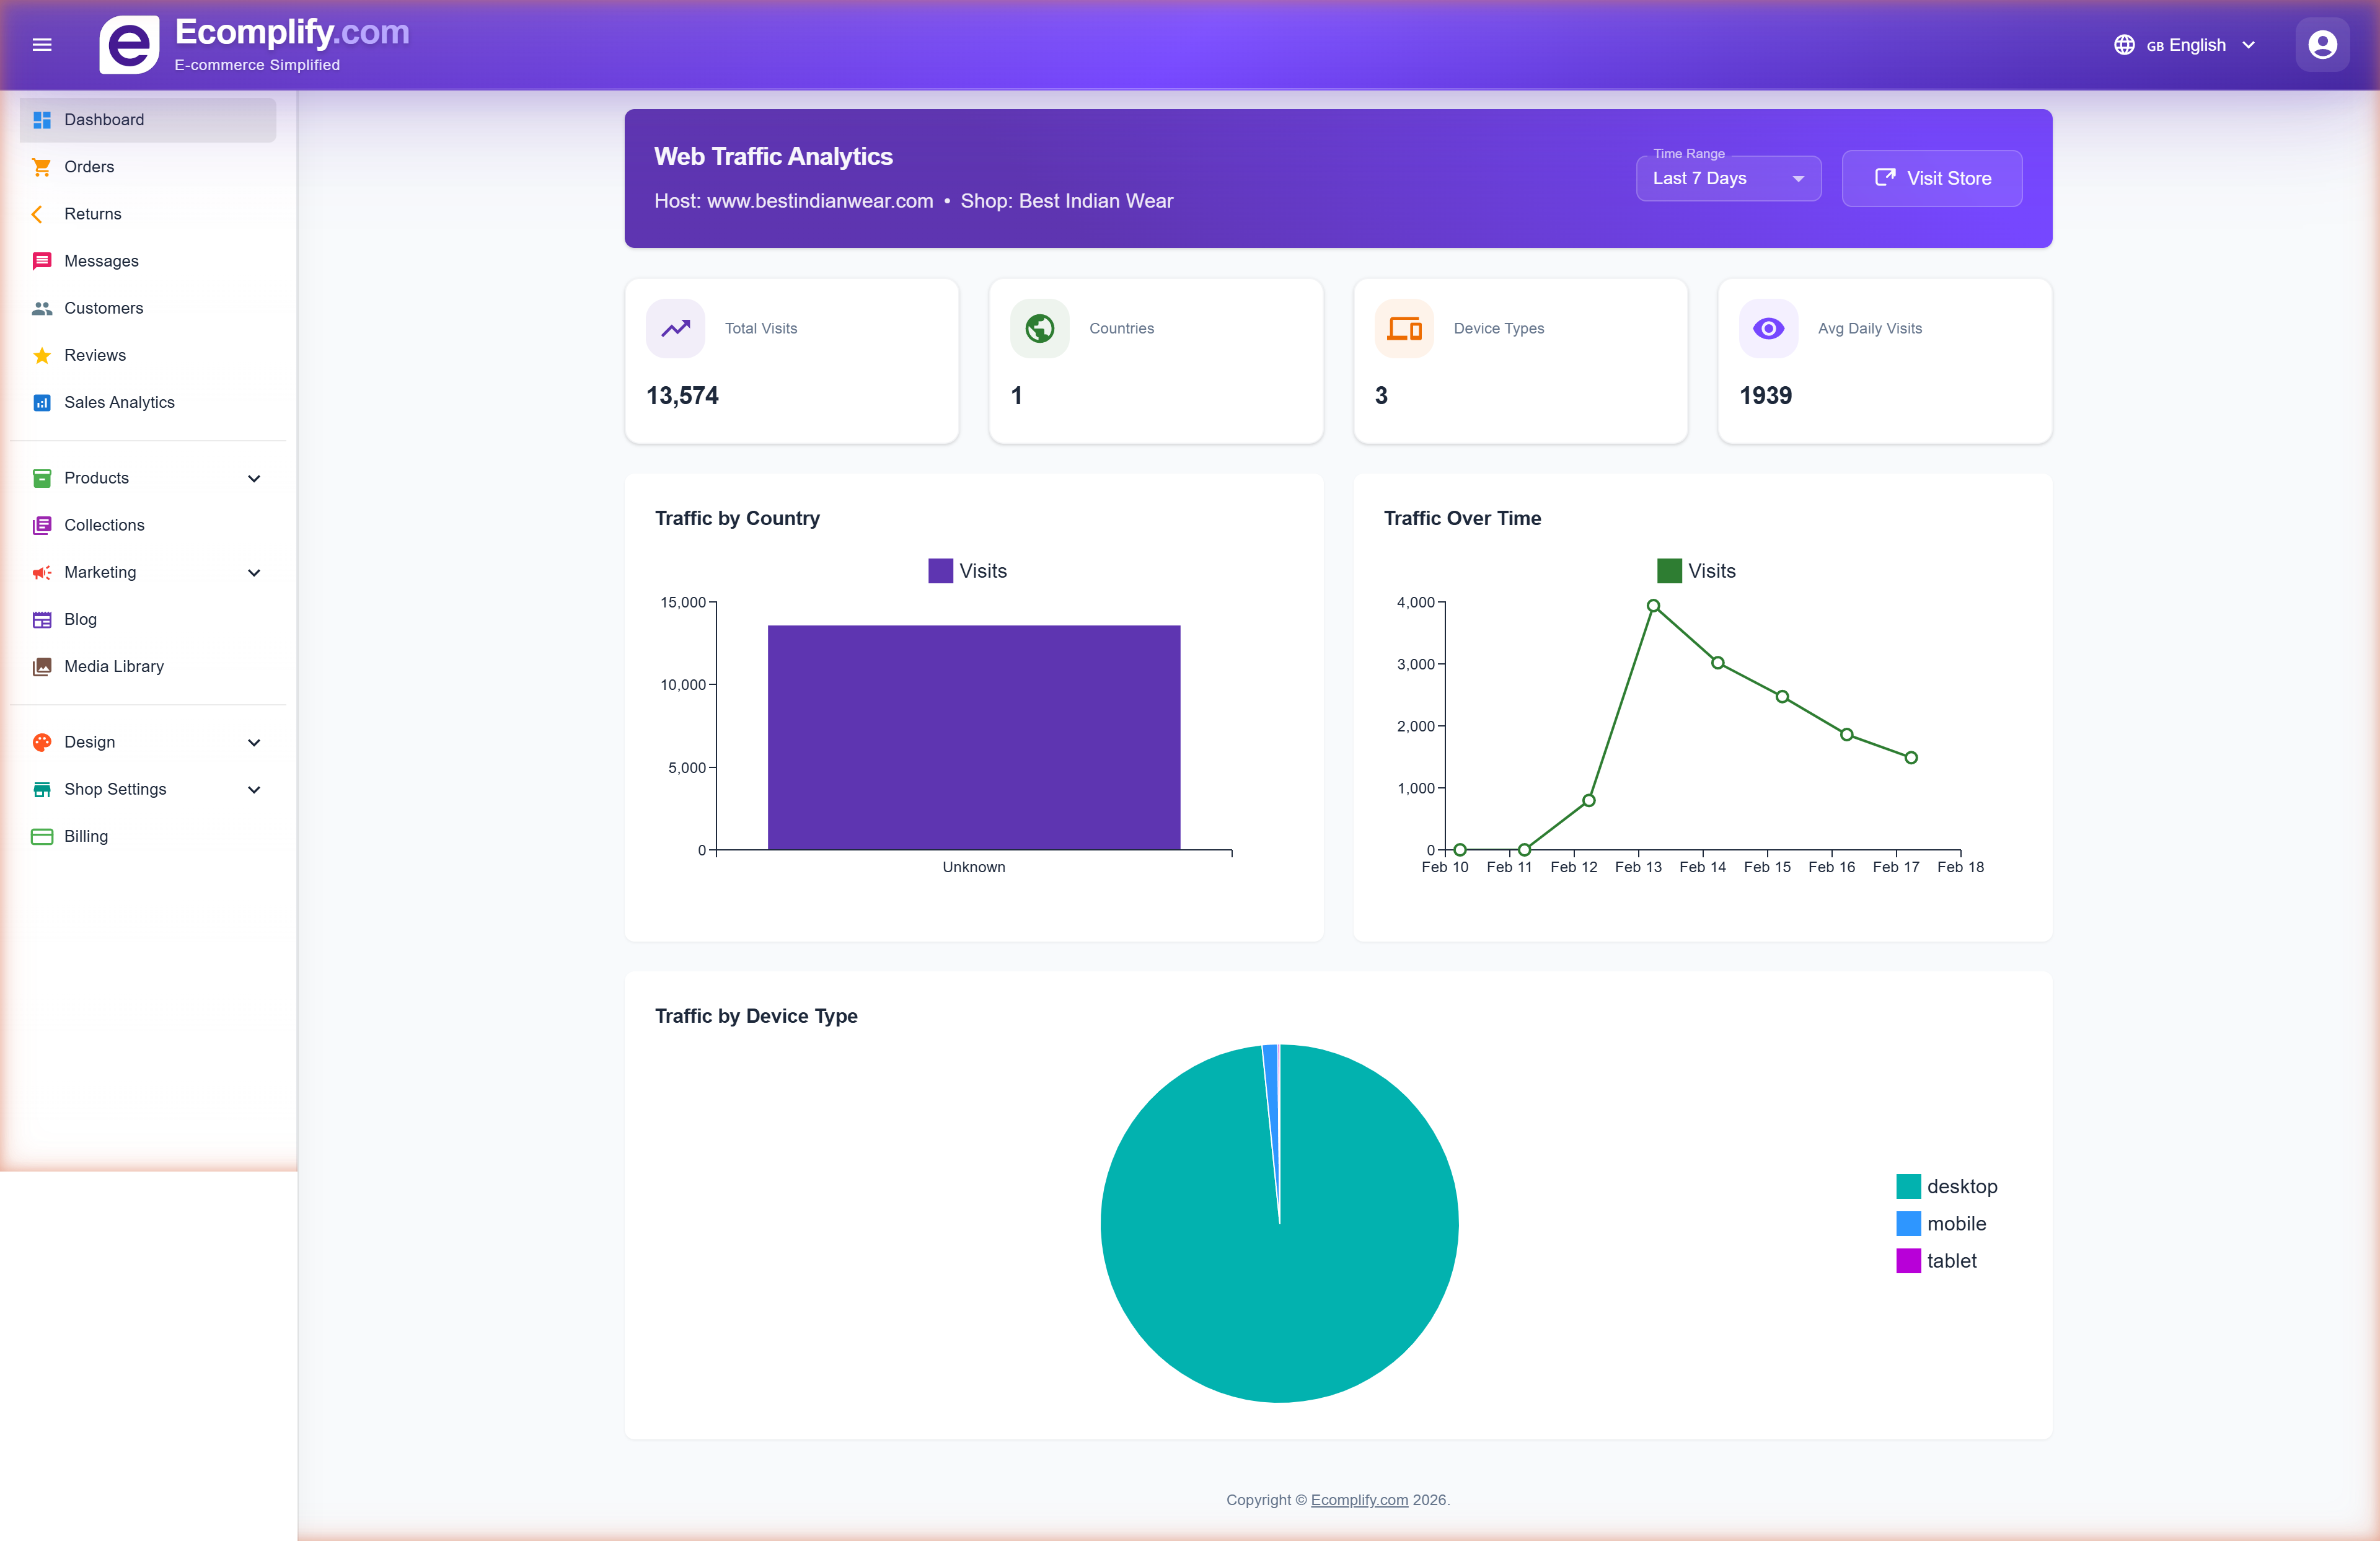
Sidebar Navigation
The left sidebar provides access to all sections:
- Dashboard - Web traffic analytics and overview
- Orders - Order management and fulfillment
- Returns - Process customer returns
- Messages - Customer communications
- Customers - Customer directory
- Reviews - Review moderation
- Sales Analytics - Revenue and sales reports
- Products - Product catalog (List, Create, Bulk Upload)
- Collections - Product collections
- Marketing - Discounts and offers
- Blog - Blog content management
- Media Library - Image and file management
- Design - Theme and appearance settings
- Shop Settings - Store configuration
- Billing - Plan and subscription management
Header Bar
The top bar includes:
- Store indicator - Shows your active store name and domain
- Language selector - Switch dashboard language
- User profile - Account settings and logout
First Steps
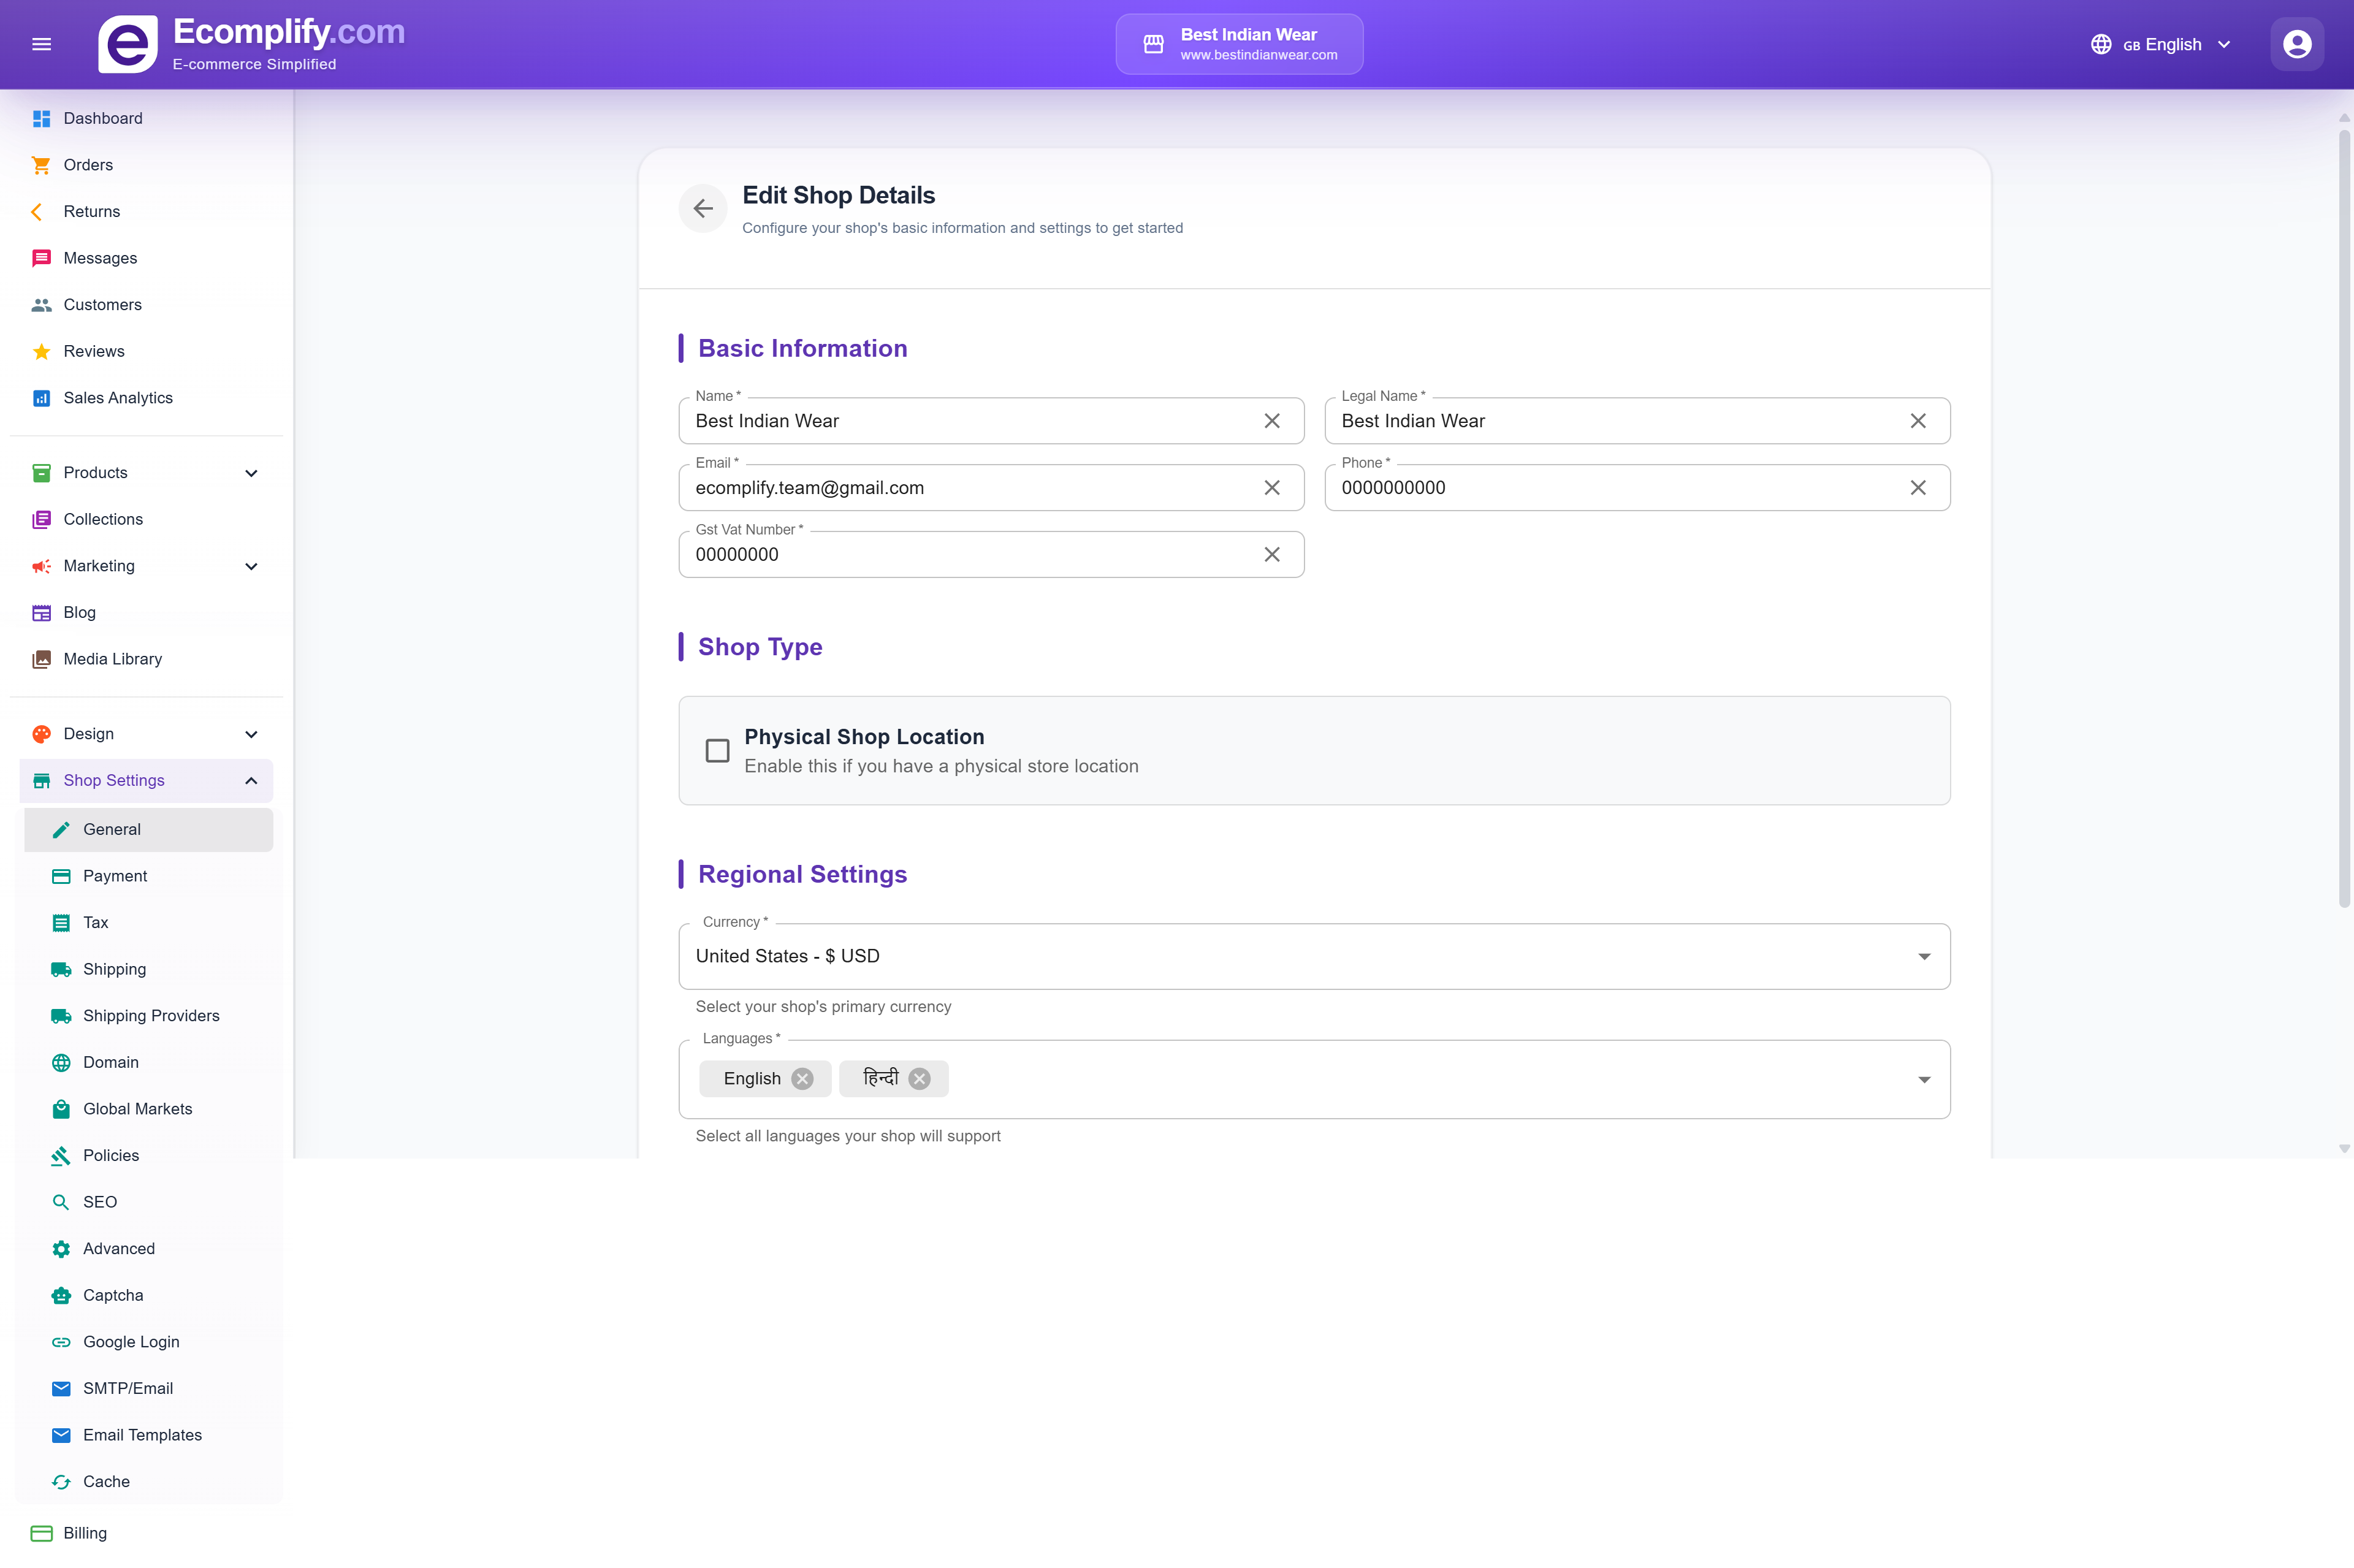
1. Configure Your Store
Navigate to Shop Settings > General to set up your store basics:
- Store name and legal name
- Contact email and phone
- GST/VAT number
- Shop type (physical/online)
- Currency and supported languages
2. Set Up Payments
Go to Shop Settings > Payment to configure payment gateways:
- Cash on Delivery - Enable COD for your region
- Stripe - Enter your Stripe API keys for card payments
- Razorpay - Configure Razorpay for Indian payments

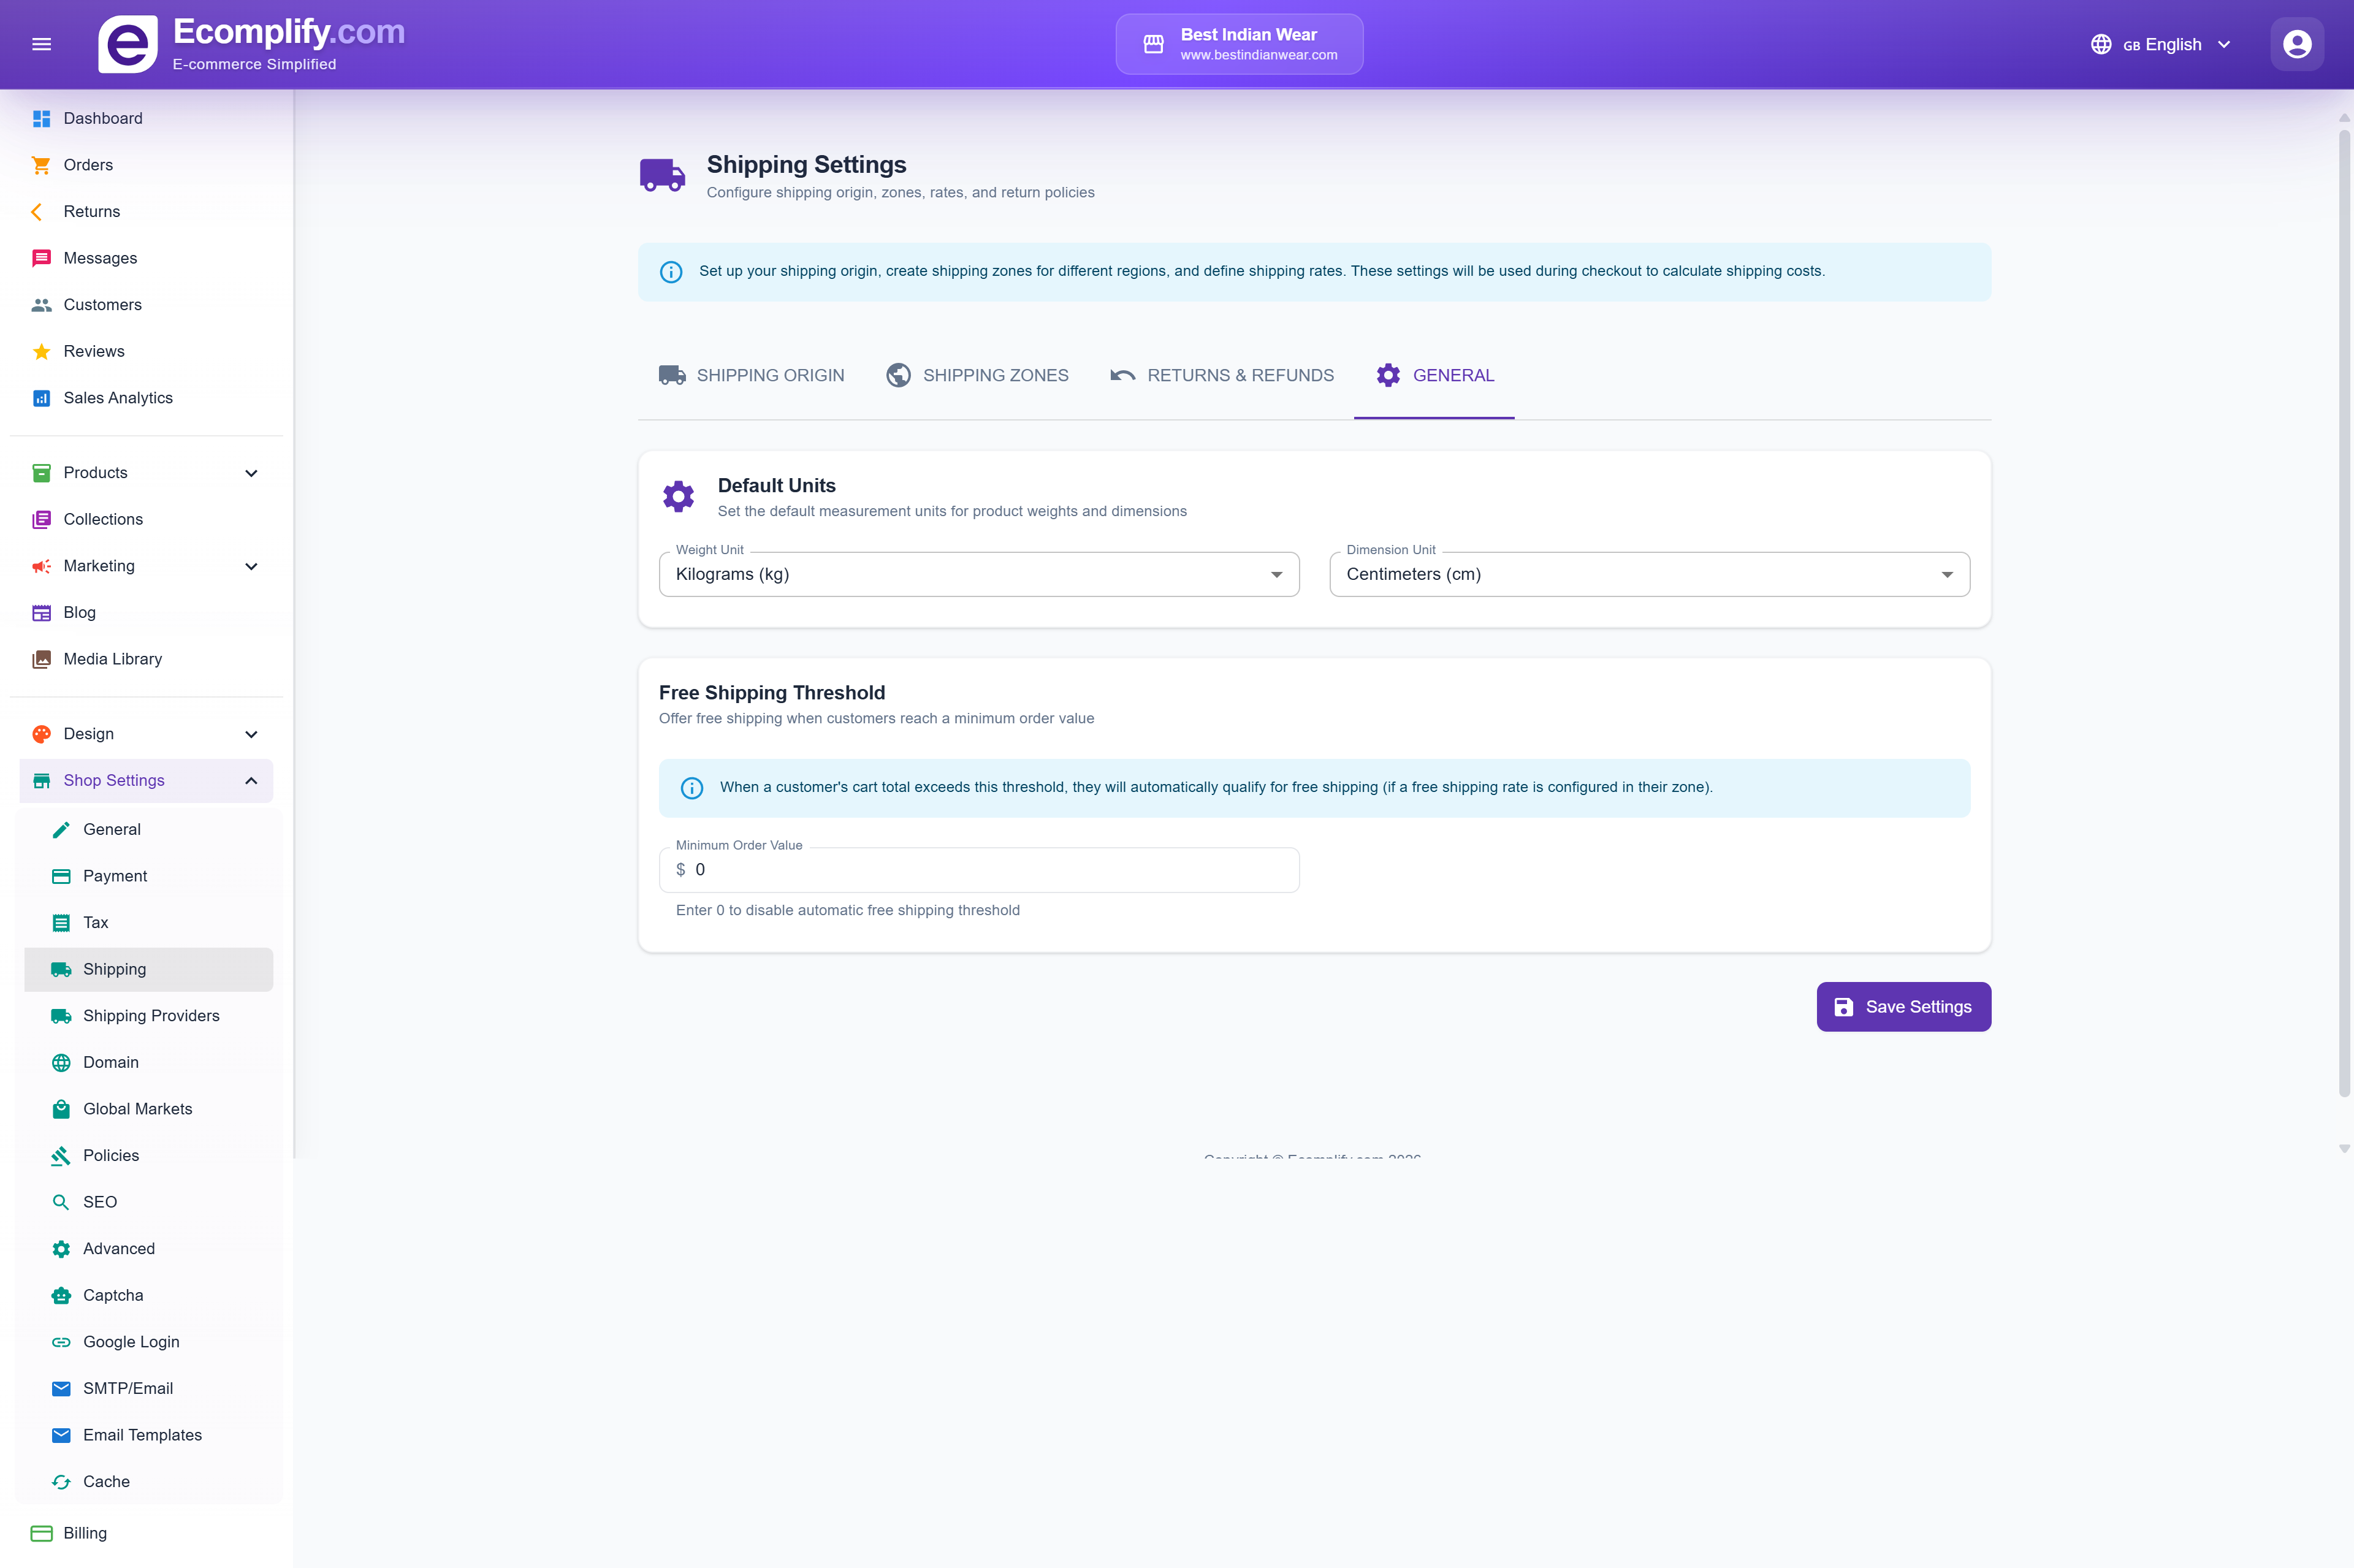
3. Configure Shipping
Set up shipping in Shop Settings > Shipping:
- Set your shipping origin (warehouse address)
- Create shipping zones for different regions
- Define shipping rates
- Configure return and refund policies
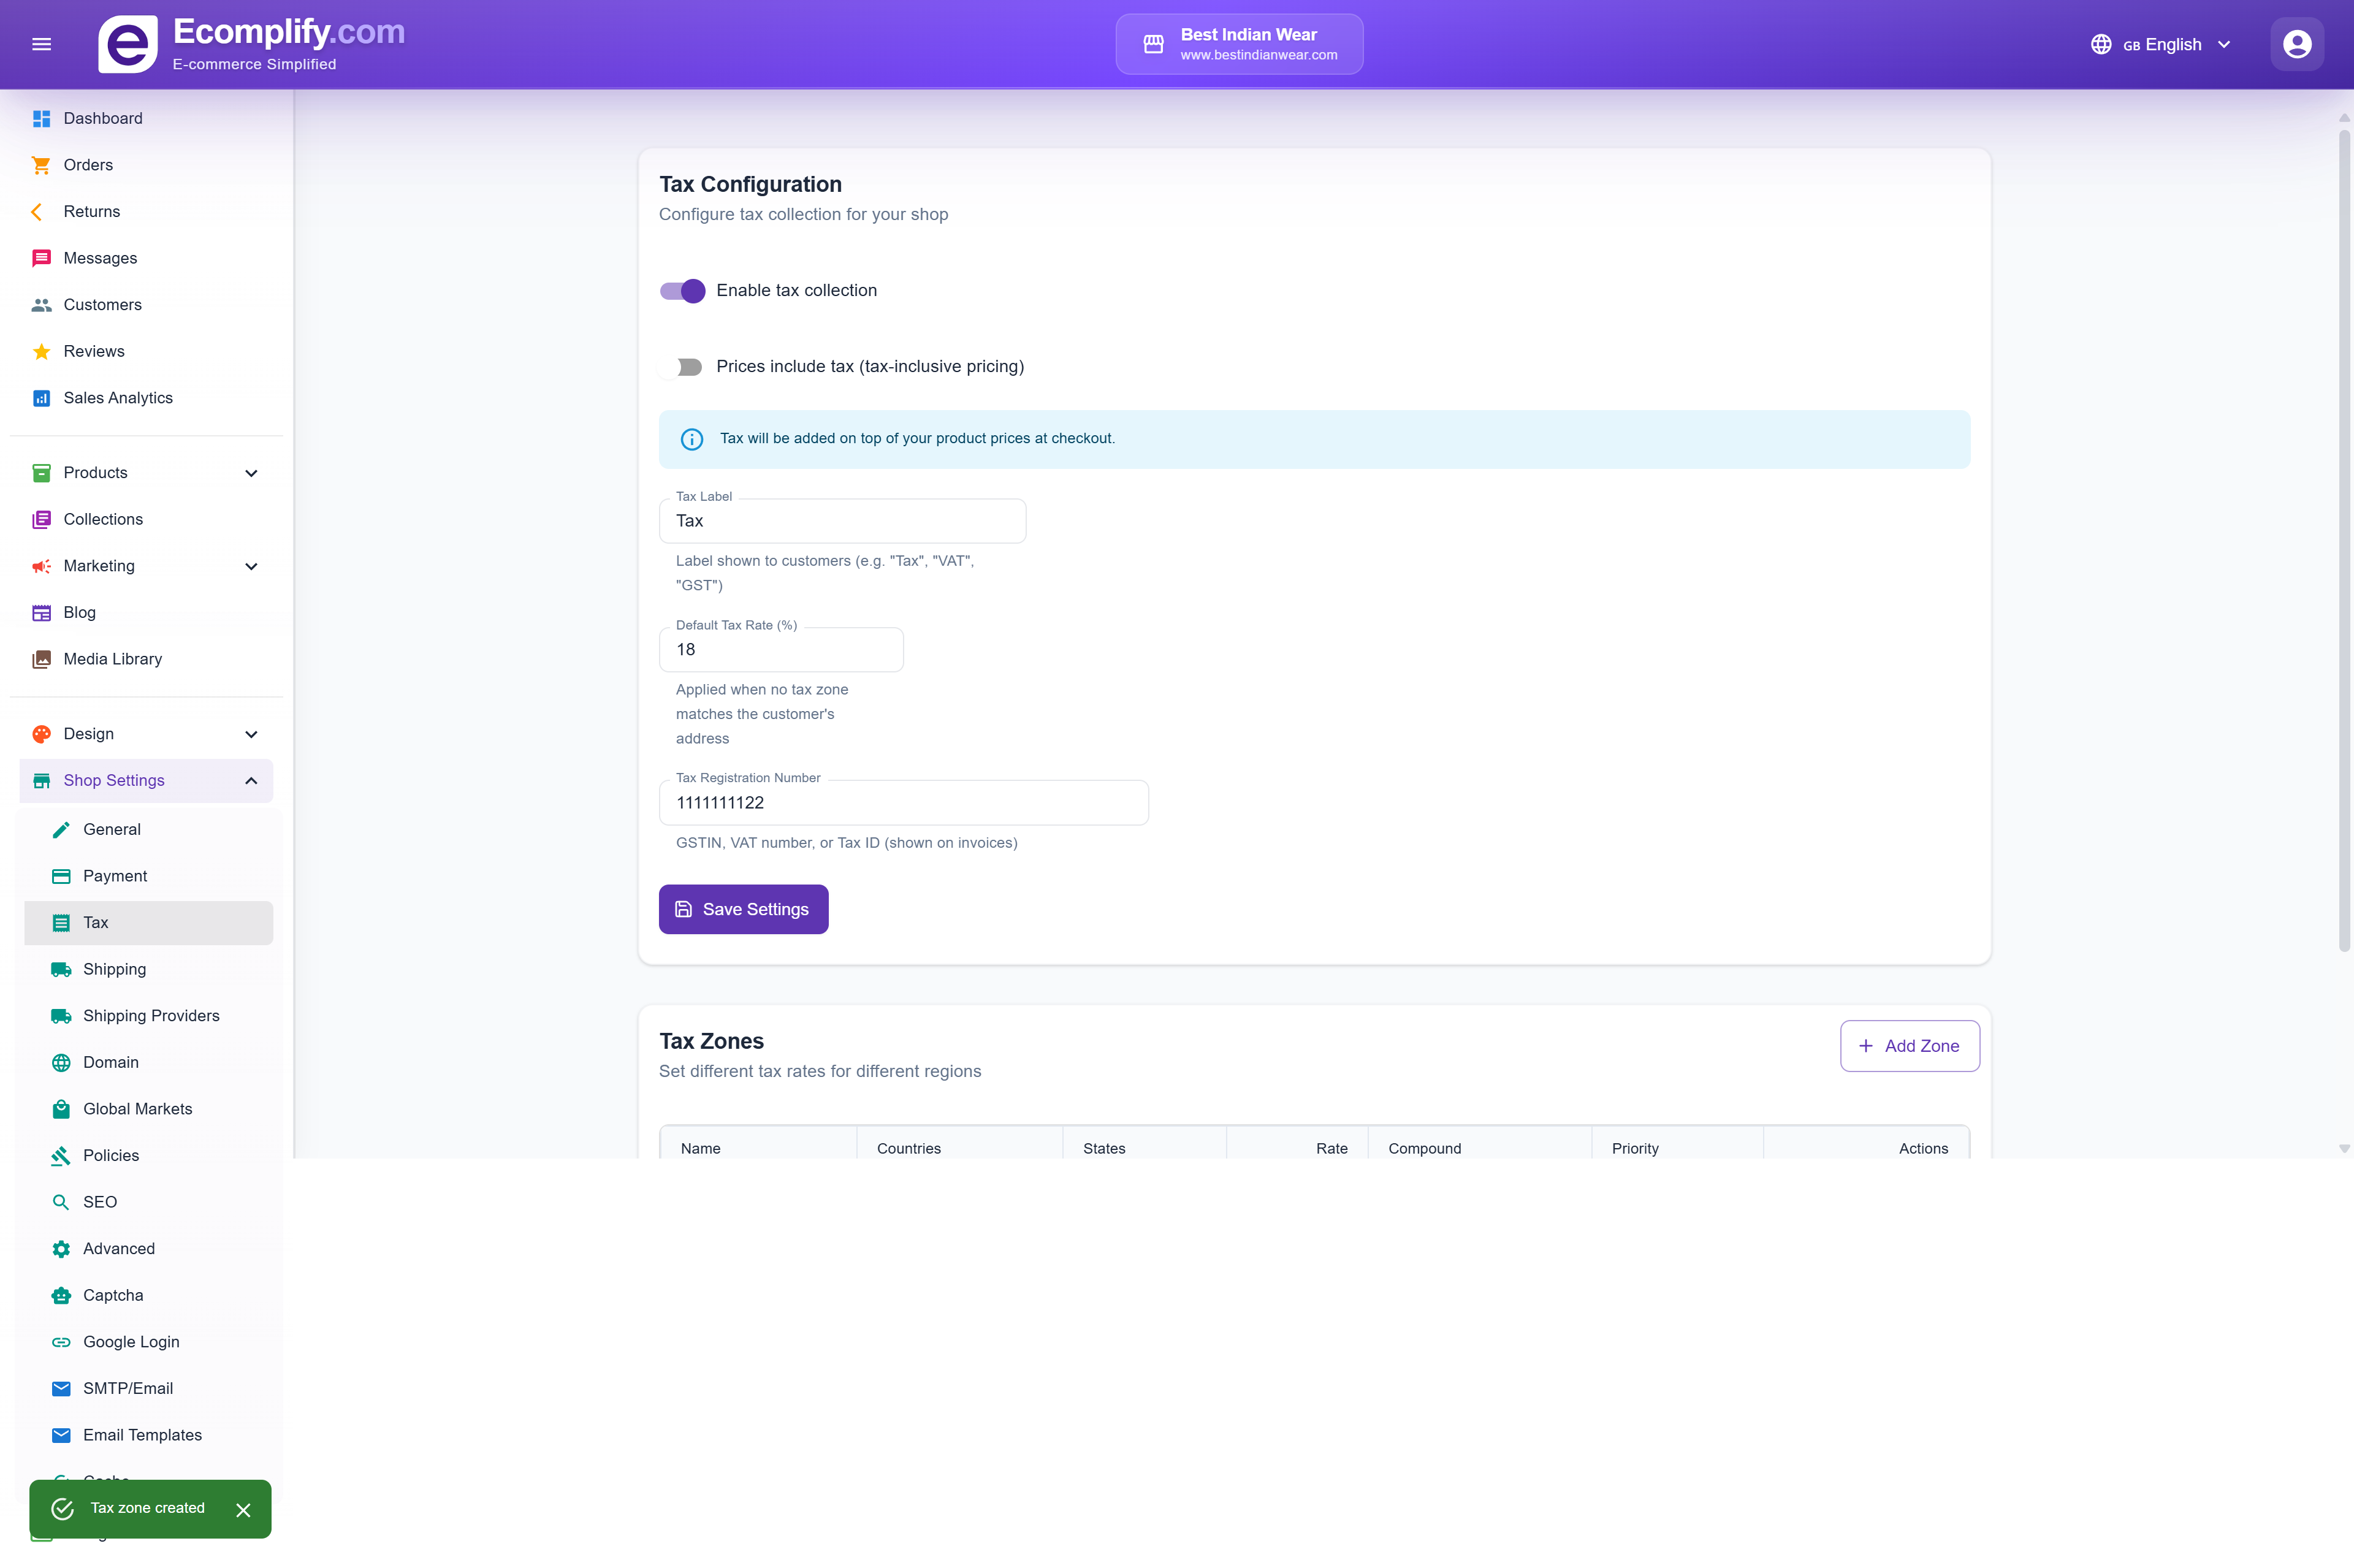
4. Configure Taxes
Navigate to Shop Settings > Tax to set up tax rules:
- Enable tax collection
- Set default tax rate
- Create tax zones for different regions with custom rates
- Choose tax-inclusive or tax-exclusive pricing
5. Add Your First Product
Go to Products > Create and fill in:
- Product name and description (rich text editor)
- Media gallery (images)
- Pricing and inventory
- Product options/variants
- Shipping details (weight, dimensions)
- SEO metadata
See the Products guide for detailed instructions.
6. Customize Your Store Design
Visit the Design section to personalize your storefront:
- Choose a theme template
- Set your logo and favicon
- Configure announcement banners
- Customize header menu and footer
See the Design & Themes guide for details.
Next Steps
Now that your store is set up, explore the detailed guides for each feature: